My favourite stuff to make. DESSERTS!!!!!
Monday, February 21, 2011
Recipe: Dark Choco-Rum Mousse with Dulce de Leche
Does anyone not like Dark chocolate? I am going to ignore any of you who are putting your hands up. A nice soft mousse, with a dense Dulce de Leche topped with whipped cream. That is what we are making today.
Dulce de Leche is a Caramel Milk sauce which seems to be the unofficial national food of Argentina. It is very very dense and sweet and may not be to everyones tastes. If you don't agree with it you can skip it and make just the mousse with whipped cream.
Ingredients:
Choco-Rum Mousse
250 grams Dark Cooking Chocolate.
200 grams of heavy cream. (I used fresh cream from a dairy).
4 eggs, separated.
150 grams confectioner's Sugar
1 tablespoon Coffee, (if you have espresso, nothing better).
1.5 tablespoons Dark Rum.
1 teaspoon of Vanilla Extract
75 grams of Butter.
Dulce de Leche
1 can of sweetened Condensed Milk.
Lets COOK!!!!!
Naturally, you start with the Dark Chocolate Slabs.


Take your heavy cream and whip it till it forms soft peaks. It is very easy to separate heavy cream and turn it into butter. Shake it around too much and you can watch the fats separate from the liquids leaving you with a nice lump of butter. I even read somewhere that Butter was first discovered when someone carried a bucket of heavy cream from the dairy to the farmhouse. They swung the bucket too hard and by the time they got home, voila... butter!!!
The way to whip your cream would be to use an ice bath. Use a double bowl, fill the bottom bowl with ice and cold water and put the second bowl in it. Wait for the surface of the inner bowl to chill before adding your cream and whipping away.
Once your soft peaks are formed, you can put that away into a refrigerator.


Beat your egg whites till they have soft peaks. Once you are there, start slowly adding sugar whilst constantly beating. You want a smooth glossy mixture.


Choco-Rum Mousse
250 grams Dark Cooking Chocolate.
200 grams of heavy cream. (I used fresh cream from a dairy).
4 eggs, separated.
150 grams confectioner's Sugar
1 tablespoon Coffee, (if you have espresso, nothing better).
1.5 tablespoons Dark Rum.
1 teaspoon of vanilla extract
75 grams of Butter.
Dulce de Leche
1 can of sweetened Condensed Milk.
Lets COOK!!!
To make the Choco-rum Mousse
Points to keep note off:-
1) When melting chocolate make sure all your utensils, bowls, spoons, everything is dry. Even a couple of drops of water can turn some nice chocolate sauce into a thickened mess.
If you do manage to do this, then your best bet is to add a little more water. If you go over the 1 tablespoon per ounce mark (approx) then the chocolate should melt again.
2) Do not over beat the eggs and the whipped cream. It will make it really difficult for you to fold them into the chocolate when you are making it. The whipped cream can be salvaged by just pressing into it with a spoon and releasing the air. This will make it go liquidy again.
The eggs, I dont know how to salvage. Your best bet would be to get new eggs and start again.
Dulce de Leche is a Caramel Milk sauce which seems to be the unofficial national food of Argentina. It is very very dense and sweet and may not be to everyones tastes. If you don't agree with it you can skip it and make just the mousse with whipped cream.
Ingredients:
Choco-Rum Mousse
250 grams Dark Cooking Chocolate.
200 grams of heavy cream. (I used fresh cream from a dairy).
4 eggs, separated.
150 grams confectioner's Sugar
1 tablespoon Coffee, (if you have espresso, nothing better).
1.5 tablespoons Dark Rum.
1 teaspoon of Vanilla Extract
75 grams of Butter.
Dulce de Leche
1 can of sweetened Condensed Milk.
Lets COOK!!!!!
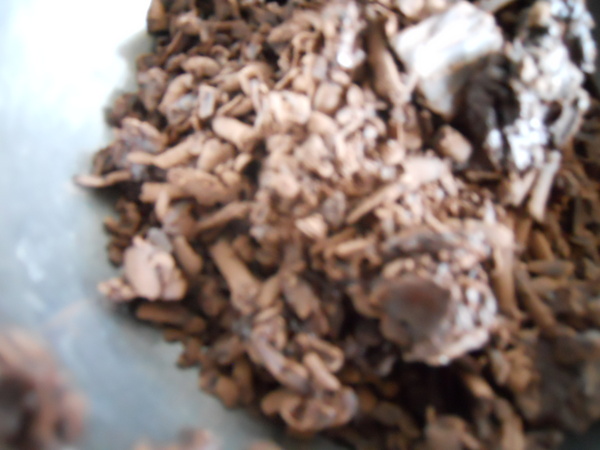
Naturally, you start with the Dark Chocolate Slabs.

Chop them up fine. The finer you can chop them, the easier it will be to melt them later. I found it easier to grate it which gave me really fine slivers.
Take your heavy cream and whip it till it forms soft peaks. It is very easy to separate heavy cream and turn it into butter. Shake it around too much and you can watch the fats separate from the liquids leaving you with a nice lump of butter. I even read somewhere that Butter was first discovered when someone carried a bucket of heavy cream from the dairy to the farmhouse. They swung the bucket too hard and by the time they got home, voila... butter!!!
The way to whip your cream would be to use an ice bath. Use a double bowl, fill the bottom bowl with ice and cold water and put the second bowl in it. Wait for the surface of the inner bowl to chill before adding your cream and whipping away.
Once your soft peaks are formed, you can put that away into a refrigerator.
Now you want to separate your egg whites and egg yolks into separate bowls and cover them. You might not have time to break, separate and fish out egg shells later whilst the chocolate is cooling.
Heat the butter, chocolate and coffee using a double boiler. If you don't have one (and I dont either), just take a pot, fill it about a third of the way with water, and put a second pot in. Bring the water to simmer and throw in the butter.

Once the butter melts, you can add in the coffee and mix it around. Once those are mixed, add in the chocolate and stir it gently till it all melts and forms a smooth mixture.

Now you want to work quickly. You don't want your chocolate to cool down too much. It should just be warm. A good way of measuring it is to put a little bit on your lower lip. If it feels just a bit warm, its at the mixing temperature.

Hopefully you have managed this without your chocolate cooling down too much. Otherwise, reheat the chocolate in the double boiler. Put it on the stove, do not microwave. If the chocolate is too cold when you are mixing it, it wont form a smooth mixture. You really don't want a lumpy mousse do you?
While its cooling, beat your egg yolks, rum, and vanilla.
Let it cool to the right amount and mix in your egg yolk mixture.

You will need a lot of patience. Bring your whipped cream out of the fridge and fold in about a third of it.

Be gentle and patient. This first bit of folding is the hardest because the chocolate is the most dense right now. Once this is done you can fold in your egg whites slowly and gently. The gentler you are, the more air you will retain in your mousse and the lighter it will be.
Add the remaining whipped cream. Fold it together again. You should get this lovely creamy mix.

It is recommended to do all this with a silicon spatula. I need to get one, its on my shopping list of things to buy.
Set your mousse in your serving dish/bowl and put it in the fridge. It should take a good 4-5 hours in the fridge. My personal choice of utensil is a nice cocktail glass.

Whilst that is setting, you can make your Dulce de Leche. This is rather simple. Just take a can of condensed milk and poke a few holes in the top. Put it in a pot and fill the pot will boiling water till the level is up to about two-thirds of the height of the can. Boil it on medium heat for a good 1 to 1.5 hours. It ultimately depends on the final consistency you want.

Open the can and let it cool. Once its cooled, put it in the fridge till you are ready to serve the mousse.
When the mousse has set, ladle the dulce de leche into the glass. Fill it as high or as thin as you prefer. I love the taste of chocolate with dulce de leche, so I prefer a nice thick coat.

For a final touch, I piped on some whipped cream, stuck in a chocolate stick, and sprinkled some grated dark chocolate just before serving.

ENJOY!!!!!
For those of you who want a printable recipe:-
Choco-Rum Mousse
250 grams Dark Cooking Chocolate.
200 grams of heavy cream. (I used fresh cream from a dairy).
4 eggs, separated.
150 grams confectioner's Sugar
1 tablespoon Coffee, (if you have espresso, nothing better).
1.5 tablespoons Dark Rum.
1 teaspoon of vanilla extract
75 grams of Butter.
Dulce de Leche
1 can of sweetened Condensed Milk.
Lets COOK!!!
To make the Choco-rum Mousse
- Take your chocolate slabs and dice/grate them into fine shavings.
- Prepare your ice bath and whip your cream in it till it forms soft peaks. Put the cream into the fridge for now.
- Separate your eggs yolks and whites into two separate bowls and keep them covered and ready. You can beat and keep your egg yolks ready. To the egg yolks add your vanilla and your rum.
- Take a double boiler and bring the water to a simmer.
- Add the butter and stir it till it melts.
- Add the coffee to the butter and stir till it forms a smooth mixture.
- Slowly add the chocolate whilst stirring constantly.
- Melt and mix the ingredients till it forms a smooth consistent paste.
- Take your chocolate off the heat and let it cool.
- Quickly whip your egg whites till they form soft peaks. Slowly add the sugar whilst constantly beating till it forms a smooth glossy mixture.
- When your chocolate has cooled to a warm temperature, add in the egg yolks.
- Add 1/3rd of your whipped cream and fold it into the chocolate mixture gently.
- Fold in your whipped egg whites into the chocolate-cream mixture. Again be gentle.
- Spoon in your rum on the surface and fold in your remaining whipped cream.
- Put the mouse in the serving dishes and let it set in a fridge for 4-5 hours.
- Punch holes in the lid of a tin of condensed milk. You can also just open the lid slightly with a tin opener.
- Put it in a boiling water bath for 1 - 1.5 hours. Remove when it has reached the consistency you desire.
- Let it cool and enjoy!!.
Points to keep note off:-
1) When melting chocolate make sure all your utensils, bowls, spoons, everything is dry. Even a couple of drops of water can turn some nice chocolate sauce into a thickened mess.
If you do manage to do this, then your best bet is to add a little more water. If you go over the 1 tablespoon per ounce mark (approx) then the chocolate should melt again.
2) Do not over beat the eggs and the whipped cream. It will make it really difficult for you to fold them into the chocolate when you are making it. The whipped cream can be salvaged by just pressing into it with a spoon and releasing the air. This will make it go liquidy again.
The eggs, I dont know how to salvage. Your best bet would be to get new eggs and start again.
Thursday, February 10, 2011
Recipe: Apple Pie
Its Apple Pie. Yummilicious Apple Pie. Do you want me to talk and describe or should I just get onto the recipe? ... I thought so...
Ingredients:
The Crust:
2.5 cups of all purpose Flour
200 grams of softened butter. (not melted)
1 teaspoon salt
1 tablespoon sugar
8 tablespoons of ice cold water. (I used melted ice)
1 teaspoon cinnamon
A dash of nutmeg powder
1 tablespoon honey
The Filling
4 or 5 Apples (I used red delicious washington apples)
2 tablespoons of all purpose Flour
1 cups of white sugar
1.5 tablespoons of Cinnamon powder
1/4 tablespoon of nutmeg powder
2 tablespoons of Honey
1 tablespoon Apple Cider Vinegar
Along with that, you can keep a large bowl, half filled with water, and a tea spoon of lemon juice ready.
Lets COOK!!!!
Important Advice: If this is your first time making apple pies, make extra dough. Increase all the ingredients by proportion. If some goes to extra, just put it in the oven to bake, its going to taste like buttery shortbread when it comes out.
Sift out the flower in a bowl/pot. Add in your dry ingredients like salt, sugar, cinnamon powder and nutmeg.

For this recipe you want your ingredients to be as cold as possible. Even your butter should be left out to soften on its own. If you need to microwave your butter, do not let it melt inside.

Add in your butter to the flour.


Mix together your dough gently. Add the cold water one teaspoon at a time. As my mom described it, your dough should feel dry. It should just about barely hold together.
Wrap your dough in some plastic and set it to refrigerate for a good 20 minutes. Thats up in the freezer section. You want your dough cold.

While our dough is getting cold, its time to work on the filling.
Start with pouring out the cup of sugar into a large mixing bowl.

Add in your cinnamon powder. I tend to go a bit overboard with cinnamon, I just love it that much. You cannot get too much cinnamon in your apple.

Add in your nutmeg. I just sprinkle a dash of it on.

I love the fact that my mother enjoys collecting ingredients. It was the bottle of Apple cider vinegar that we have in our pantry that inspired me make apple pie in the first place. Add in a tablespoon of the stuff.

Add your 2 tablespoons of flour, 1 to 2 tablespoons of honey and mix the whole thing together. Cover and keep it to the side while you prepare your apples.

I love these Washington Red Delicious apples. Peel, slice and core them to your desired size. A piece of advice, smaller is better here.

Interesting tip: If you let the cut pieces soak in a bowl of water which has a teaspoon of lemon juice added to it , they wont turn brown while you are busy cutting the rest of the apples. I guess the acid in the lemon juice prevents the iron in the apples from oxidizing.

Once your apples are cut, drain the water and throw them into the bowl with the sugar mixture. Mix it around completely and make sure the apples are well coated with the spices.

Can I just add that it looks and smells yummy? It took some serious willpower to not eat half of it right then and there.
Start up your oven and get it to 220 degrees centigrade.
By now your dough should be ready, so take it out of the fridge.

Cut it into two halves. Take one half and roll it to the size of your Pie dish. Bit of advice from Mommy: Put it between two sheets of plastic, makes rolling the dough a lot easier.
Lay the dough onto your pie dish. Use a fork to poke holes in it to let out the steam.

Add in the filling.


To prevent the edges from browning too much, cover them with aluminum foil.

If your oven is up to temperature, pop the apple pie in. You would want to bake it for about 15 minutes at 220, and then lower the temperature down to about 190-200 degrees for another 30-40 minutes.

It is ready when the crust is a golden brown and the juices start to seep up. Remove and serve it nice and warm with a dollop of vanilla ice cream. YUMMMMM!!!!

Ingredients:
The Crust:
2.5 cups of all purpose Flour
200 grams of softened butter. (not melted)
1 teaspoon salt
1 tablespoon sugar
8 tablespoons of ice cold water. (I used melted ice)
1 teaspoon cinnamon
A dash of nutmeg powder
1 tablespoon honey
The Filling
4 or 5 Apples (I used red delicious washington apples)
2 tablespoons of all purpose Flour
1 cups of white sugar
1.5 tablespoons of Cinnamon powder
1/4 tablespoon of nutmeg powder
2 tablespoons of Honey
1 tablespoon Apple Cider Vinegar
Along with that, you can keep a large bowl, half filled with water, and a tea spoon of lemon juice ready.
Lets COOK!!!!
Important Advice: If this is your first time making apple pies, make extra dough. Increase all the ingredients by proportion. If some goes to extra, just put it in the oven to bake, its going to taste like buttery shortbread when it comes out.
Sift out the flower in a bowl/pot. Add in your dry ingredients like salt, sugar, cinnamon powder and nutmeg.

For this recipe you want your ingredients to be as cold as possible. Even your butter should be left out to soften on its own. If you need to microwave your butter, do not let it melt inside.

Add in your butter to the flour.

Pour in the honey.

Mix together your dough gently. Add the cold water one teaspoon at a time. As my mom described it, your dough should feel dry. It should just about barely hold together.
Wrap your dough in some plastic and set it to refrigerate for a good 20 minutes. Thats up in the freezer section. You want your dough cold.

While our dough is getting cold, its time to work on the filling.
Start with pouring out the cup of sugar into a large mixing bowl.

Add in your cinnamon powder. I tend to go a bit overboard with cinnamon, I just love it that much. You cannot get too much cinnamon in your apple.

Add in your nutmeg. I just sprinkle a dash of it on.

I love the fact that my mother enjoys collecting ingredients. It was the bottle of Apple cider vinegar that we have in our pantry that inspired me make apple pie in the first place. Add in a tablespoon of the stuff.

Add your 2 tablespoons of flour, 1 to 2 tablespoons of honey and mix the whole thing together. Cover and keep it to the side while you prepare your apples.

I love these Washington Red Delicious apples. Peel, slice and core them to your desired size. A piece of advice, smaller is better here.

Interesting tip: If you let the cut pieces soak in a bowl of water which has a teaspoon of lemon juice added to it , they wont turn brown while you are busy cutting the rest of the apples. I guess the acid in the lemon juice prevents the iron in the apples from oxidizing.

Once your apples are cut, drain the water and throw them into the bowl with the sugar mixture. Mix it around completely and make sure the apples are well coated with the spices.

Can I just add that it looks and smells yummy? It took some serious willpower to not eat half of it right then and there.
Start up your oven and get it to 220 degrees centigrade.
By now your dough should be ready, so take it out of the fridge.

Cut it into two halves. Take one half and roll it to the size of your Pie dish. Bit of advice from Mommy: Put it between two sheets of plastic, makes rolling the dough a lot easier.
Lay the dough onto your pie dish. Use a fork to poke holes in it to let out the steam.

Add in the filling.

I put 5-6 lumps of butter on the filling. This melts and merges with the apples, increasing the richness of the flavours.
You can now roll out the top crust, or weave it in a net. Mom showed me an easy way of doing this. Put two strips in the center vertically. On top put two strips horizontally. Now move from the center outwards, adding one strip on each side, first on horizontally, and then vertically.

To prevent the edges from browning too much, cover them with aluminum foil.

If your oven is up to temperature, pop the apple pie in. You would want to bake it for about 15 minutes at 220, and then lower the temperature down to about 190-200 degrees for another 30-40 minutes.

It is ready when the crust is a golden brown and the juices start to seep up. Remove and serve it nice and warm with a dollop of vanilla ice cream. YUMMMMM!!!!

Wednesday, February 2, 2011
Review: California Pizza Kitchen, BKC
I love pizza. I blame it on the "Teenage Mutant Ninja Turtles" cartoons. If I may inflict a bit of self praise on the audience, I made a pretty decent pizza myself. The result of this however, is that I am extremely critical of Pizzerias. You will not see a review for either of the abominations that are Domino's or Pizza Hut on here.
Anyway, I had heard a lot about California Pizza Kitchen which has an outlet at Bandra-Kurla complex and hence decided to give it a try. It is a pizza franchise which , according to their website, serves food in an "authentic California-style. Now Wikipedia lists a California-Style Pizza as having a "New York and Italian thin crust with toppings from the California cuisine cooking style". This cooking style exemplifies "the use of nontraditional toppings that derive from cuisines other than the usual Italian-style tomato sauce and mozzarella cheese".

Anyway, I have to say that my meal did not start off on the best note. On arrival I was told that there were Valet Charges of Rs. 20. Whilst not exorbitant and usually lower than the tip I leave the valet at the end of the meal when fetching my car, I honestly felt it cheapened the whole experience at the start.
When I was clicking the picture above, I was quite rudely chastised by one of the security guards. This might have been building security and not ones hired by CPK themselves, but it definitely did not start my meal off on a good note.
They do not accept reservations, but we received a table almost immediately. They do have seating on the outside of the restaurant which looked quite comfortable especially since the evening was pleasant and cool. I was not able to click a picture of the same due to the stern look of the aforementioned security guard and ,for the sake of this blog, decided to eat indoors.

Once seated I was told that clicking pictures would be fine. I am thus inclined to believe that the blogger-hater was building security. The staff was quite friendly, however what really struck me from the outset was the noise.Not only were the patrons loud, the music was louder. At times we had to raise our voices to be heard. This seems to join the ever growing list of Pizzerias that cant decide whether they want to be a fun loud place to be or be a formal sit down restaurant. The decor is at loggerheads with the noise. It has nice interiors with a sedate earthy, minimalist scheme of a formal dining experience, but the noise screams of a corner Pizzeria.

The same contradiction hits you when you sit at your table. Nice sturdy table, good looking menu, but the spoon, fork and knife are wrapped in tissue.
Now this is a place that specializes in food that is usually going to be eaten by hand. I would have liked napkins. You don't want to worry about where you are going to put your tissue paper, or have piles of it on the table. You also don't want to repeatedly ask the waiter for tissue, definitely not at a place where you are going to spend over Rs. 750 per person.

The manager was happy enough for me to take pictures of the kitchen. It is visible from the main dining area which seems to be a prerequisite for a Pizzeria nowadays. It seemed quite large, spacious and clean.

They have a gas fired hearth for baking. This should set them apart from the other Pizza chains which are sticking to electric ovens on steel conveyor belts. However, do keep note of this when it comes to the food reviews later.
Since I was dining with my Parents, we stuck to purely vegetarian fare. One surprising part of the menu was that there was no clear demarcation of the vegetarian and non-vegetarian items. For the vegetarians out there, be careful when you order.
We started off with a bowl of "Sedona Tortilla Soup" split between my mother and me.

The menu claims it to be a soup of vine ripened tomatoes, mild green chili and south western spices, garnished with corn and tortilla chips.
They went overboard with the green chili. I was recently discussing food with a former 5-star hotel chef who reminded me that Chili is not supposed to be a flavour. In the natural world, chili is in fact a defense mechanism for the plant so that animals do not eat their seeds. It is mostly used to override all other tastes. In the soup, it was all we could taste. Sharp green chili. It left the table unconsumed by both my mother and me.
Rating: 3/10
As one of the appetizers, we also ordered a "Vegetarian Combo Platter".This seemed to have a mini helping of the various starters that the menu holds and thus offered the perfect way to review a lot of dishes without ordering too many.

Lets start off with the Hummus and Pita. The Pita bread was good. Quite fresh, which is almost a prerequisite in a place where breads are their... well... bread and butter. The hummus on the other hand had too much garlic and lemon juice. It was very sharp to taste. The texture was nice and creamy though. It was sad that a little less garlic could have left me with a very pleasant experience.
Rating: 5/10
It came with a helping of Focaccia bread. Now the platter menu says we have a choice of "Herb Onion" or "Garlic Cheese". The waiter forgot to offer that choice to us, bringing us the Garlic Cheese. Lucky for him it would have been my first choice anyway.
The bread again was soft, fresh and well baked. The toppings, however, were not the best. Whilst they had a decent taste of garlic, there was barely any cheese. The toppings were begging for some oregano, basil, anything really. There was nothing to round off the sharp garlic taste. Such a waste and another case of so close, yet so far.
Rating: 5/10
Third on the platter was a set of Lettuce Wraps. Here they served what seemed to be iceberg lettuce on the side, in which you spoon on the filling and the sauces. The filling consisted of Shitake Mushrooms and Waterchestnuts, with bowls of chopped tomatoes and sweet sauce on the side.
This was the best thing we ate all evening. The waterchestnuts and mushrooms were nice and juicy. The lettuce was fresh and crisp. I generally like plum sauce with my lettuce wraps, but the sweet sauce they gave was quite nice.
Rating: 7/10
As my parents have quite a small appetite, we decided to order a set of Mediterranean Tortilla Spring Rolls as part of the main course.

These come with two sauces, one was a chili sauce and I did not try the other. The filling also was composed of Shitake Mushrooms.
This was a disappointment. The tortillas seemed to be made of flour rather than corn and hence it would be more apt to call it a simple Baked Roll. The mushrooms had completely dried out and were lacking in salt. They tasted overcooked.
Remember when I mentioned that they use a gas fired oven? Well one of the advantages of gas is that they theoretically do not dry out food as much as electric ovens. Mind you, this is theoretically. Since they will generally maintain a higher temperature than electric ovens and do not have the capability of fine tuning the temperature, you have a much smaller sweet spot within which you need to remove the food before it will get overcooked. Precision is everything. You can get away with a little charcoaling of a pizza crust as the carbonization adds flavour, but the heat wrecks havoc on everything else. It especially will dry out toppings, fillings and everything else.
Rating: 5/10
They have a wide range of Pizzas and offer a regular and a thin crust. All their regular pizzas can be made in a thin crust format for an additional charge of Rs. 20. Considering the usual mark up on pizzas, I really did not understand why they would want to charge Rs. 20 on a 400-500 Rupee pizza for changing the type of crust. In food there is a usual markup of about 300% and so even if they incur an additional charge of Rs. 10 to change the crust (hence with markup they charge Rs. 20) , I think they should have just absorbed it rather than show it on the menu. It struck me as another miserly moment on the part of the people who created the menu.
As the second item on our main course, we decided on a "Wild Mushroom Pizza" with the normal crust.

The menu specifies this as having Shitake, Cloud and white mushrooms, Fontina and Mozzarella Cheeses, with mushroom pesto, garnished with Italian parsley.
This is another case of the food having missed the sweet spot. Whilst the bread was good, the mushrooms had dried out in the oven. This can usually be made up for by having a decent quantity of pizza sauce, but CPK seems to specialize in toppings rather than sauces (from their California style heritage I guess). The dried overcooked mushrooms just killed the whole pizza.
Rating: 4.5/10
At this point of time we were quite disappointed in the food and just skipped dessert. Though I have heard that the strawberry cheesecake is nice, I think i will review that as a part of The Great Cheesecake Chase.
Review of the Dishes:-
Sedona Tortilla Soup : 3/10
Hummus and Pita: 5/10
Focaccia bread (Garlic Cheese) : 5/10
Lettuce Wraps: 7/10
Mediterranean Tortilla Spring Rolls: 5/10
Wild Mushroom Pizza: 4.5/10
Review of the Restaurant:-
Food: 4.5/10
Aesthetics of food: 7/10
Ambiance: 5/10
Service: 8/10
Value for Money: 4/10
Subscribe to:
Posts (Atom)
